Quick Start — Your First Checkout
From a fresh deployment to a working hosted checkout flow.
Quick Start — Your First Checkout
This guide walks through the complete journey after the stack is already installed: logging in, configuring a payment provider, and processing a real checkout session end-to-end.
Prerequisites
Before starting, ensure you have:
- A running Payment Gateway deployment (start with Self-Hosted Installation)
- Admin Panel access at your
ADMIN_FRONTEND_DOMAIN(e.g.dashboard.yourcompany.comoradmin.yourcompany.com; hosted:dashboard.payment-gateway.app— Hostnames & DNS conventions) - A payment provider account — Stripe is the easiest to start with (see Provider Setup)
Step 1 — Log In to the Admin Panel
Navigate to your admin domain. On first visit you will be prompted to register a Passkey (WebAuthn). This is the only authentication method — there are no passwords.
[!NOTE] Passkey registration requires a device with a biometric authenticator (Face ID, Touch ID, Windows Hello) or a FIDO2 hardware key. Chrome, Safari, Edge, and Firefox all support WebAuthn.
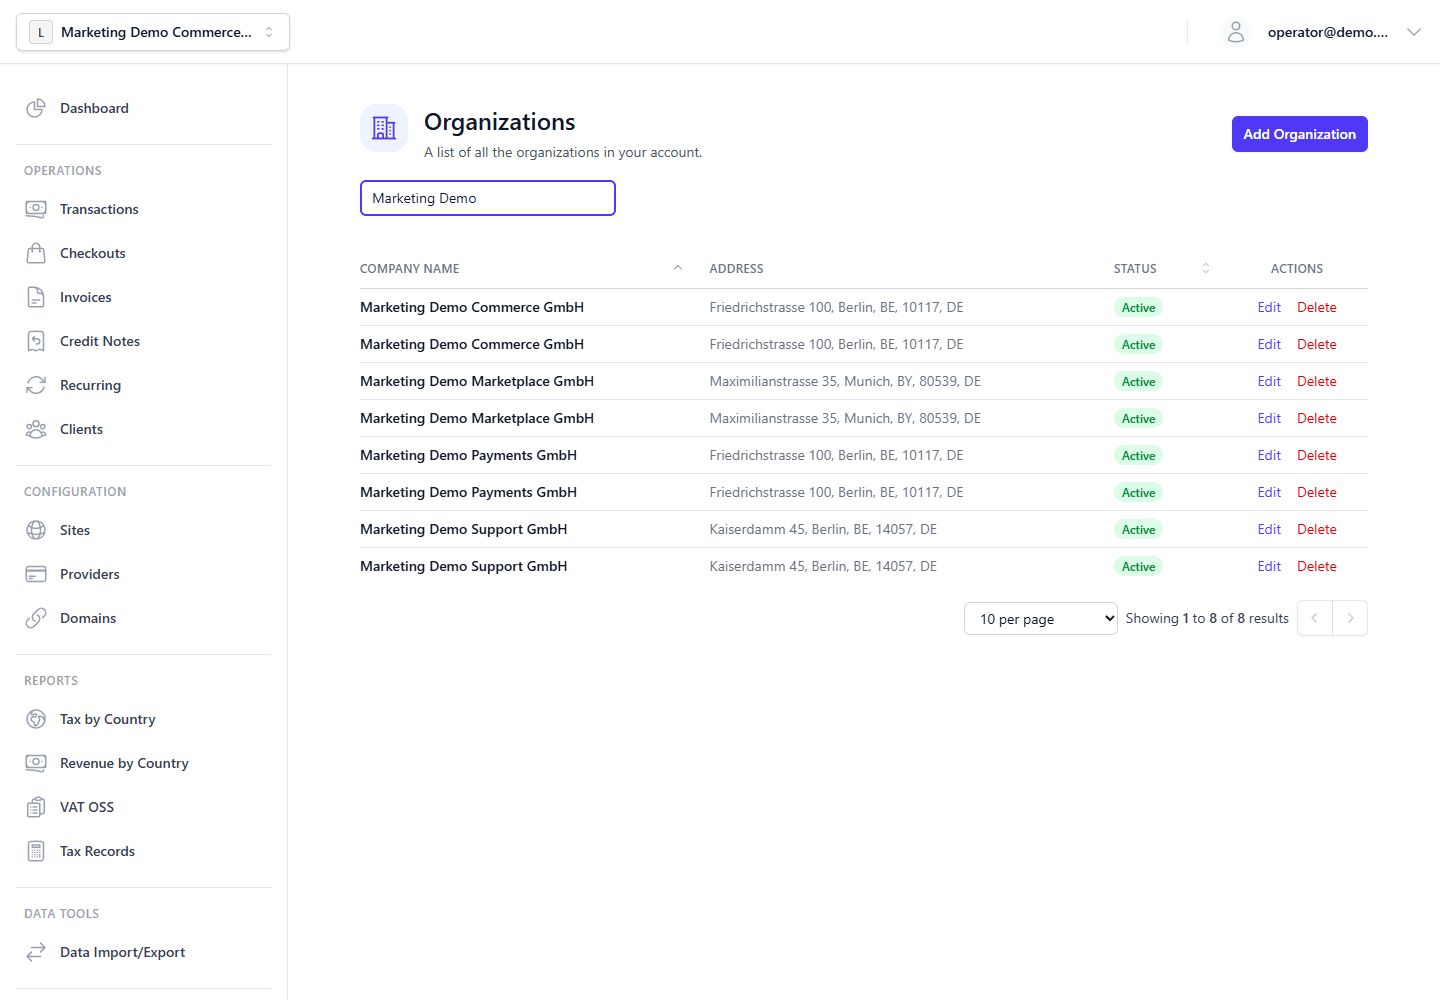
Step 2 — Create an Organization
Organizations are the top-level tenant in the system. All payment data, providers, invoices, and clients belong to an organization.
- In the Admin Panel, go to Organizations → New Organization.
- Enter a display name (e.g., your company name).
- Click Create.
You will be placed inside the new organization's context automatically.
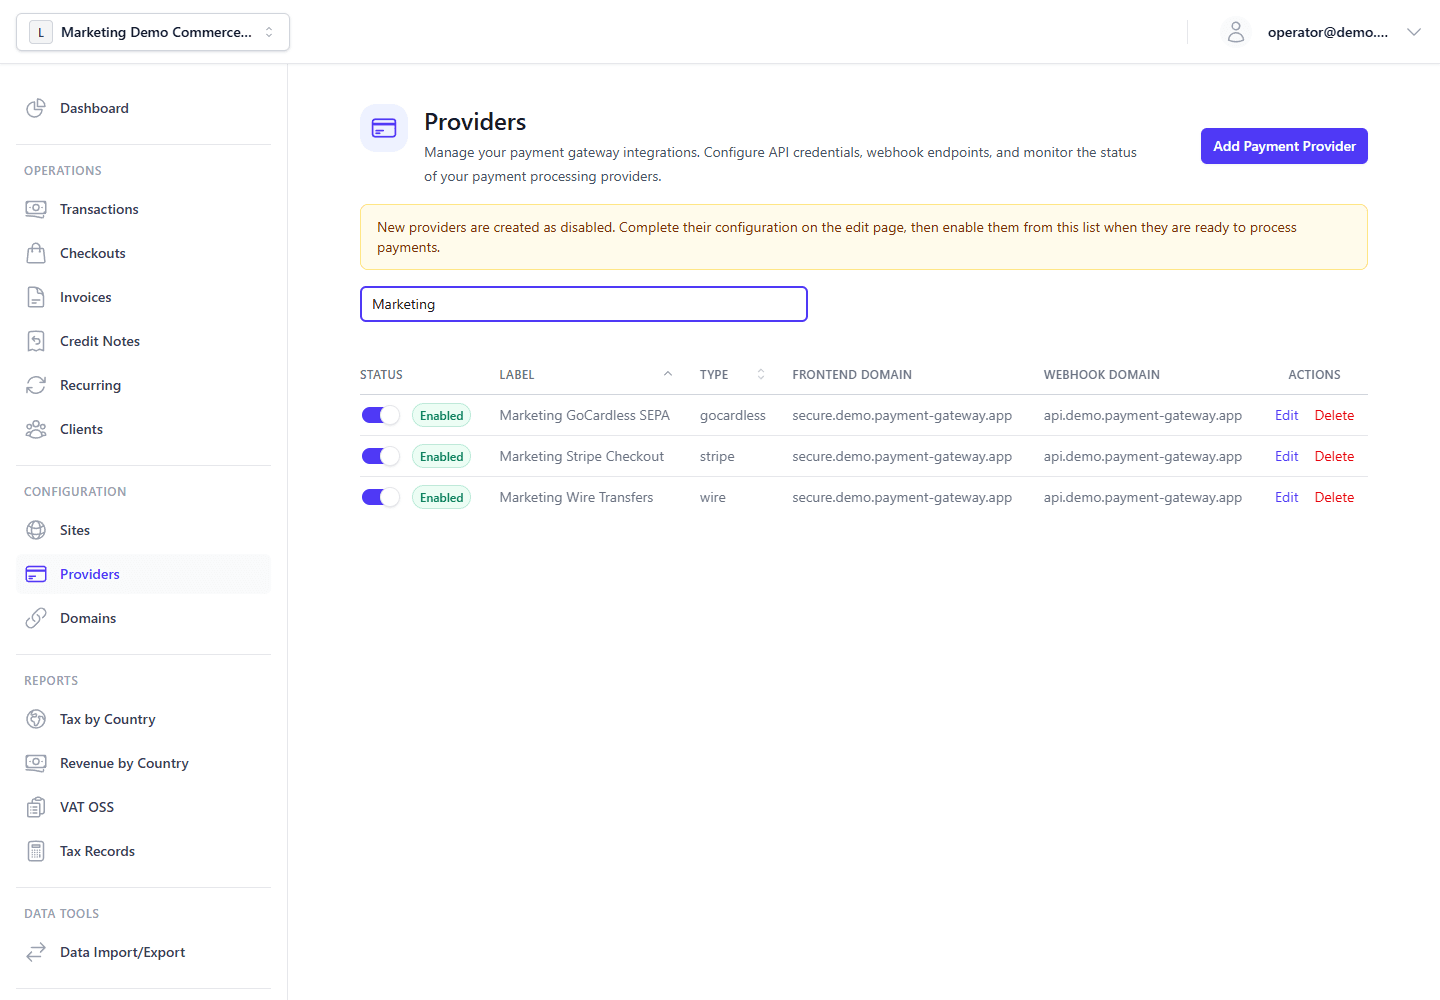
Step 3 — Add a Payment Provider
A provider is the external payment processor that handles card tokenization and money movement.
- Navigate to Providers → Add Provider.
- Select Stripe from the list.
- Enter your Stripe Secret Key (
sk_live_...for production,sk_test_...for testing). - Enter your Stripe Publishable Key (
pk_live_...orpk_test_...). - Enter your Stripe Webhook Secret (generated when you register the webhook endpoint — see Provider Setup for the exact steps).
- Click Save.
[!CAUTION] Provider credentials are encrypted with your organization's Data Encryption Key (DEK) at rest. Do not share or log raw provider API keys.
Before saving, verify that the provider record shows both public and secret credential fields as configured and that the webhook secret matches the provider dashboard.
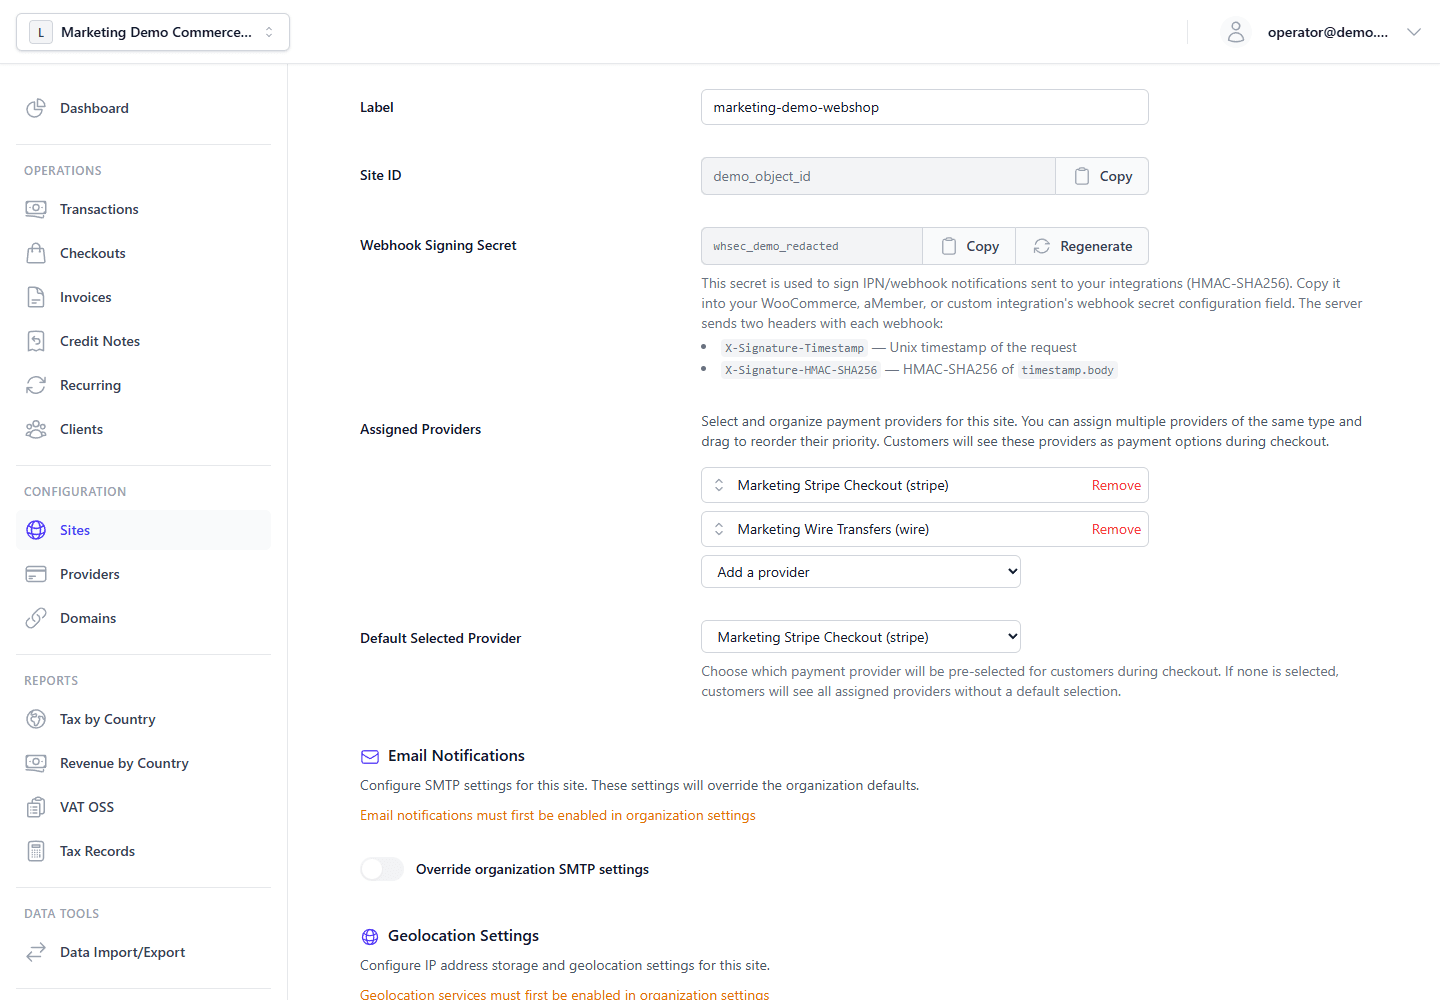
Step 4 — Create a Site
A Site represents a checkout surface — your storefront, SaaS product, or branded payment page.
- Navigate to Sites → New Site.
- Give it a name (e.g.,
My Store). - Assign the Stripe provider you just created.
- Optionally choose the default provider customers should see first.
- Click Create.
After creation, open Sites → Edit Site and copy two values for later integrations:
- the Site ID used in the checkout creation path, and
- the Webhook Signing Secret used to verify outbound IPN requests sent to your own
ipnUrl.
Sites do not generate API keys. API keys are created separately at the organization level.
Use the Site detail screen as the source of truth for the Site ID and Webhook Signing Secret used by your integration.
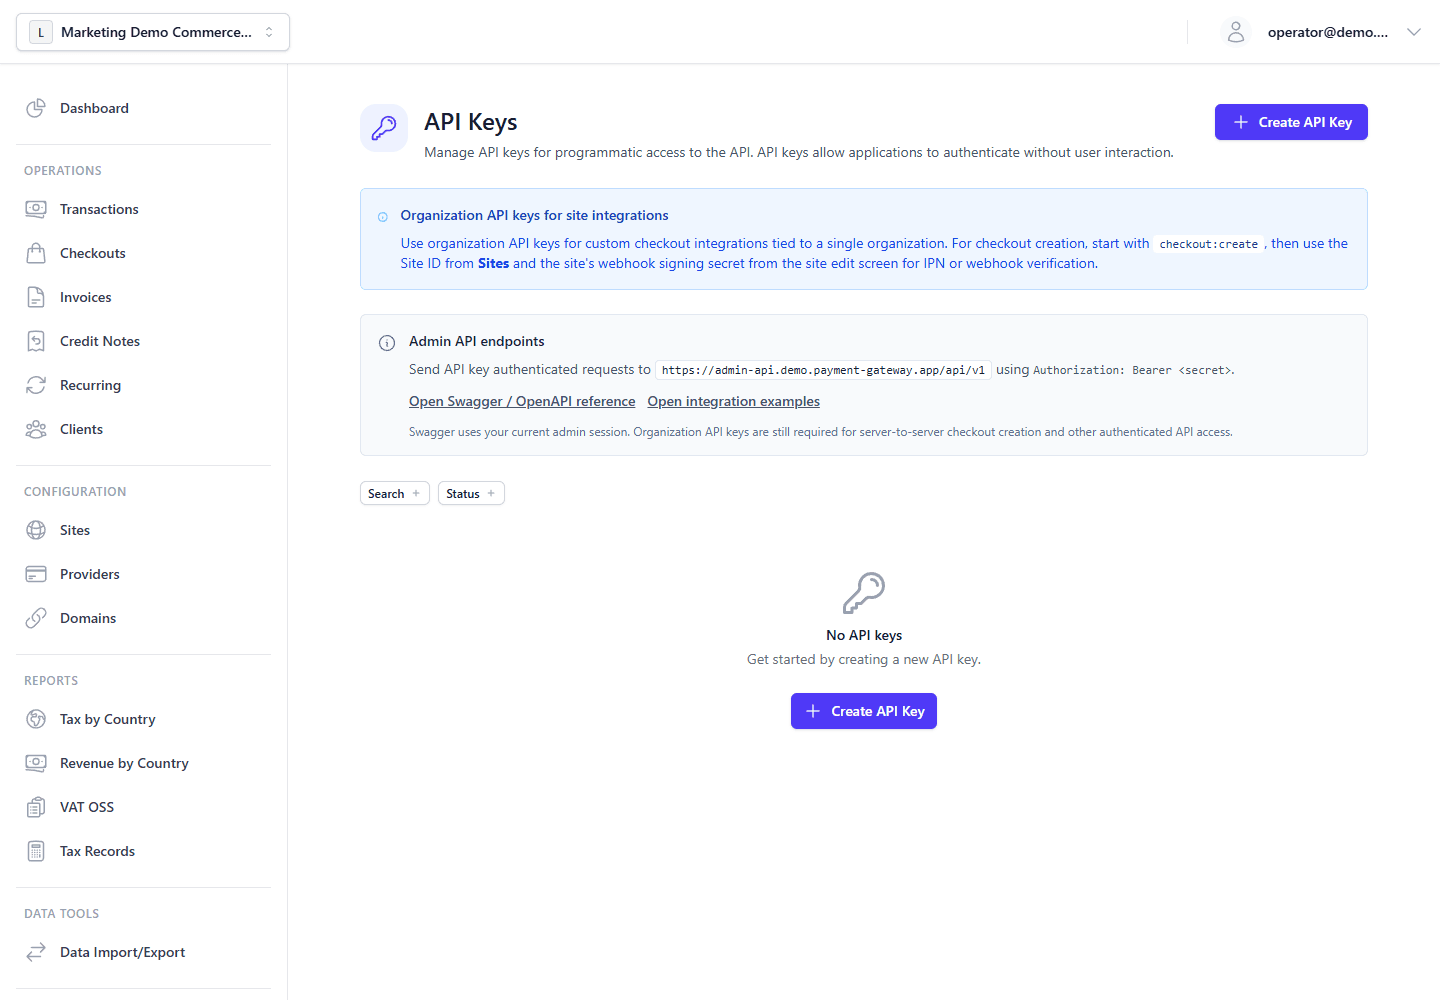
Step 5 — Create an Organization API Key
For server-to-server integrations, create an organization API key before calling the Admin API.
- Navigate to Settings → API Keys.
- Click Create API Key.
- Assign at least the
checkout:createscope. - Store the generated
sk_...secret in your secrets manager. It is shown only once.
The API key secret is revealed only once. Store it before leaving the creation flow.
Step 6 — Create a Checkout Session (Dashboard)
The simplest way to test is through the Admin Panel:
- Navigate to Checkouts → Create Checkout.
- Select your Site.
- Add a line item: name, quantity, and amount.
- Click Generate Checkout URL.
The system returns a URL on your main frontend host (MAIN_FRONTEND_DOMAIN), e.g. https://secure.yourcompany.com/checkout/abc123 or hosted https://secure.payment-gateway.app/checkout/abc123 — Hostnames & DNS conventions.
Step 7 — Create a Checkout Session via API
For real integrations, your backend server creates checkout sessions programmatically.
curl -X POST https://api.yourcompany.com/api/v1/checkouts/{siteId}/create \
  -H "Authorization: Bearer sk_live_keyid.secret" \
  -H "Content-Type: application/json" \
  -d '{
    "amount": 4900,
    "currency": "EUR",
    "email": "buyer@example.com",
    "returnUrl": "https://yourapp.com/success?txId={transactionId}",
    "cancelUrl": "https://yourapp.com/cancel",
    "ipnUrl": "https://yourapp.com/webhooks/payment-ipn",
    "externalReference": "order_12345",
    "items": [
      {
        "name": "Professional Plan",
        "description": "Professional Plan",
        "quantity": 1,
        "unitPrice": 4900,
        "vatRate": 19,
        "itemType": "digital_service"
      }
    ]
  }'
[!IMPORTANT] Provide at least one of
externalReferenceorinvoiceNumber. The API accepts both.
[!NOTE] Find your Site ID in the Admin Panel under Sites → Edit Site — it appears in the page URL and in the site detail screen.
[!NOTE] Use
ADMIN_BACKEND_DOMAINfor thiscurlhost (e.g.api.yourcompany.com; hosted:api.payment-gateway.app). The Admin Panel is onADMIN_FRONTEND_DOMAIN(e.g.dashboard.yourcompany.com; hosted:dashboard.payment-gateway.app) — Hostnames & DNS conventions.
[!NOTE] All amounts are in the smallest currency unit (cents for EUR/USD, pence for GBP).
4900= €49.00.
The JSON response includes paymentUrl (and sessionPublicId, id, optional shortCode). Redirect your customer to paymentUrl to open the hosted checkout.
Step 8 — Receive the Webhook Confirmation
After the customer pays, the payment provider sends a webhook to your Main Backend. The gateway verifies the signature, normalizes the event, and updates the transaction.
To be notified on your server, pass ipnUrl when creating the checkout (as in Step 7) and verify posts with the Webhook Signing Secret from Sites → Edit Site — see Webhooks & IPN for headers, payload shape, and signature algorithm.
See the same page for inbound provider webhooks vs outbound IPN to your ipnUrl.
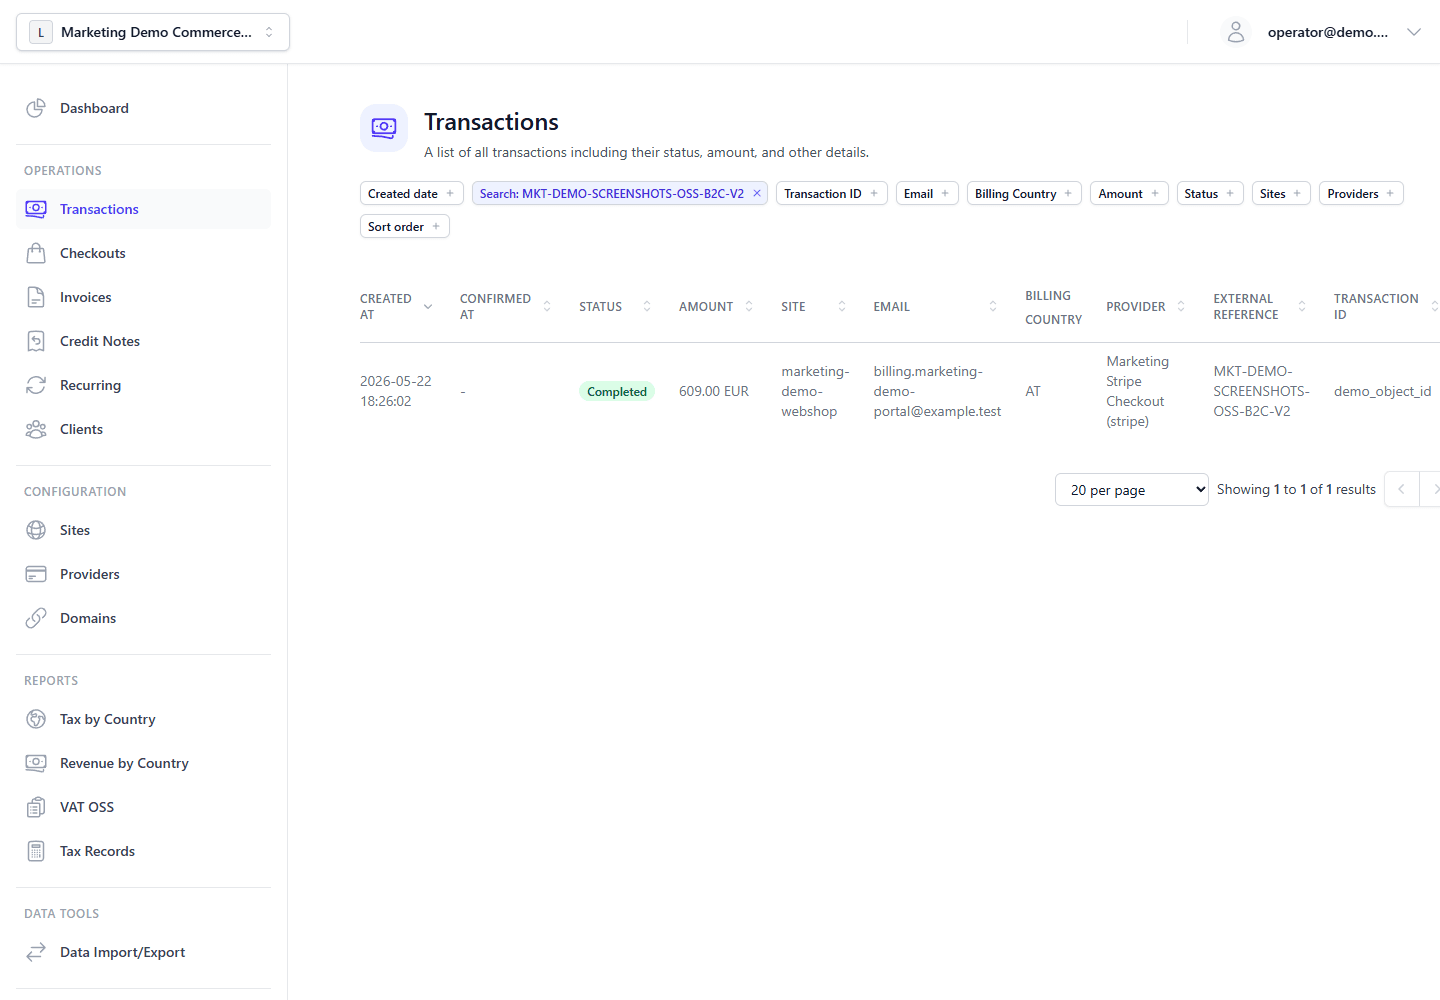
Step 9 — View the Transaction
Navigate to Transactions in the Admin Panel. Your completed payment appears with full metadata: amount, provider, tax breakdown, customer details, and invoice link.
For tax-enabled organizations, verify the full checkout chain: the checkout/session totals, completed transaction totals, issued invoice totals, and canonical tax record totals should agree. For mixed baskets, goods and shipping lines should use the shipping country with billing fallback, while digital service, tax, and discount lines should use the billing country. The line-level tax-rate codes on the transaction, invoice, and tax record should reflect those destinations.
The Transactions list is the first operator checkpoint for payment status, provider reference, tax context, invoice link, and outbound IPN delivery state. Open a transaction for the full detail view.
What's Next
-
Integration Recipes - Practical checkout, webhook, IPN, reconciliation, and tax export examples
-
Tax Configuration Examples - Scenario-based VAT, OSS, reverse-charge, and gross/net pricing setup
-
Server integration checklist — Ordered steps for APIs, webhooks, and IPN (skip if you only use the dashboard)
-
Provider Setup Guides — Detailed Stripe, Mollie, GoCardless, Wise, PayPal, and wire-transfer configuration
-
Testing in Sandbox Mode — Use test API keys and simulate payment flows
-
API Reference — Full endpoint documentation for programmatic integration
-
Invoicing — Auto-generate PDF invoices for transactions
-
Customer Portal — Buyer document access, payment links, and recurring cancellation
-
Recurring Schedules — Subscription invoice generation, review, and auto-issue behavior
-
Tax Engine — Configure VAT, GST, and US sales tax rules
-
Invoicing & Tax architecture — Rates, rules, OSS evidence, tax records, and reports