Server integration checklist
Ordered checklist for programmatic checkout and webhooks — hostnames, provider setup, Admin API, and IPN verification.
Server integration checklist
Use this page when wiring a custom backend or reviewing an integration. Official plugins (WooCommerce, aMember) follow the same boundaries; see E‑commerce integrations.
1. Know your hostnames
You need four public roles (often four DNS names). Do not send provider webhooks or checkout runtime traffic to the Admin API host.
| Role | Caddy / docs variable | Backend container (MPG_*) | Hosted example |
|---|---|---|---|
| Admin Panel (browser UI) | ADMIN_FRONTEND_DOMAIN | MPG_ADMIN_FRONTEND_DOMAIN | dashboard.payment-gateway.app |
| Admin API (your server → gateway) | ADMIN_BACKEND_DOMAIN | MPG_ADMIN_BACKEND_DOMAIN | api.payment-gateway.app |
| Checkout / customer portal (browser) | MAIN_FRONTEND_DOMAIN | MPG_MAIN_FRONTEND_DOMAIN | secure.payment-gateway.app |
| Main Backend (webhooks + runtime API) | MAIN_BACKEND_DOMAIN | MPG_MAIN_BACKEND_DOMAIN | webhook.payment-gateway.app |
Self-hosted .env templates set both sides to the same hostname. Integration docs and API examples usually cite the unprefixed *_DOMAIN names; backend containers read the matching MPG_* values.
Full hostname map and self-hosted examples: Hostnames & DNS conventions. Routing details: Caddy reverse proxy.
2. Register provider webhooks on the Main Backend
Stripe, Mollie, GoCardless, PayPal, and similar send events to MAIN_BACKEND_DOMAIN, path /hooks/{type}/{providerId} (no /api/v1 prefix).
- Create the provider in the Admin Panel and note the provider id (MongoDB ObjectId in the URL).
- In the provider dashboard, set the webhook URL to
https://<MAIN_BACKEND_DOMAIN>/hooks/stripe/<providerId>(ormollie,gocardless,paypal, etc.). - Save the provider webhook signing secret or verification identifier into the provider record in the Admin Panel where the provider requires one.
Step-by-step: Provider setup. Reference: Webhooks & IPN.
3. Create an Organization API key
- Settings → API Keys → create a key with at least
checkout:create(and any read scopes you need). - Store the secret once; use
Authorization: Bearer sk_...on Admin API requests only.
Never call the Admin API from untrusted browsers; keys are server-side only.
4. Create checkout sessions via the Admin API
- Host:
ADMIN_BACKEND_DOMAINonly. - Path:
POST /api/v1/checkouts/{siteId}/createon the Admin API host. The default Caddy config also accepts/v1/*as a convenience rewrite, but/api/v1/*is the canonical backend route and generated API reference path. {siteId}is the Site’s MongoDB ObjectId (Sites → Edit).
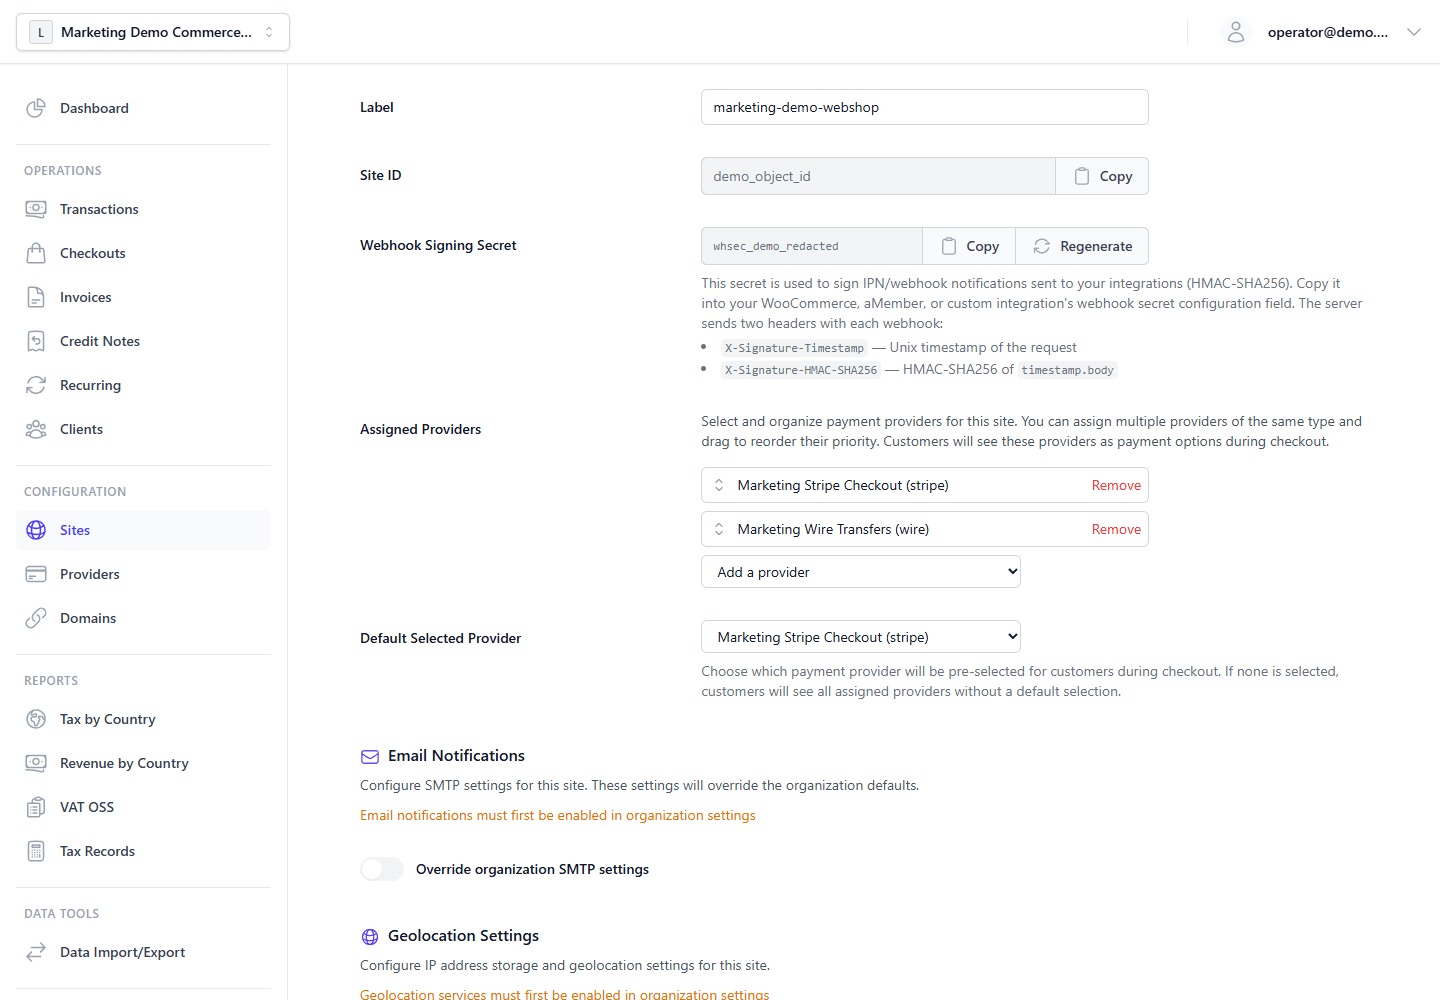
Response includes paymentUrl on MAIN_FRONTEND_DOMAIN — redirect the customer there.
Details and JSON body: Admin API — Checkouts.
5. Optional — outbound IPN to your server
If you need your own server notified on transaction status:
- Copy Webhook Signing Secret from Sites → Edit Site (
whsec_...). - Set
ipnUrlwhen creating the checkout (HTTPS in production). - Verify
X-Signature-TimestampandX-Signature-HMAC-SHA256on each POST — Webhooks & IPN — Outbound IPN.
6. Verify end-to-end
- Testing & sandbox — test keys, Stripe CLI forwarding to
https://<MAIN_BACKEND_DOMAIN>/hooks/stripe/.... - Quick Start — full UI walkthrough including dashboard checkout creation.
Related
- API Reference overview — Admin API vs Main Backend
- Sites & Domains — Site id, custom domains, API keys per site context
- Checkouts — Dashboard vs API creation